Add a wallet
Track an on-chain address as one of your accounts, alone or many at once.
Where to find it:your-organization.conta.financeAccountsNew accountWallet
A wallet is an accountA wallet or an exchange account your organization controls. that Conta Finance reads from the blockchainA public network, such as Ethereum or Solana, where a wallet holds assets and records its transactions.. Paste its address, and Conta Finance imports its full history.
Add one wallet
- Open Accounts in the sidebar and select New account.
- Select Wallet.
- In Name, type the name your team uses for the account.
- In Wallet address, paste the address.
- Optional: add a Description and Tags. To add a tag, type it and press Enter.
- Check the chips under Blockchains tracked.
- Select Create wallet.
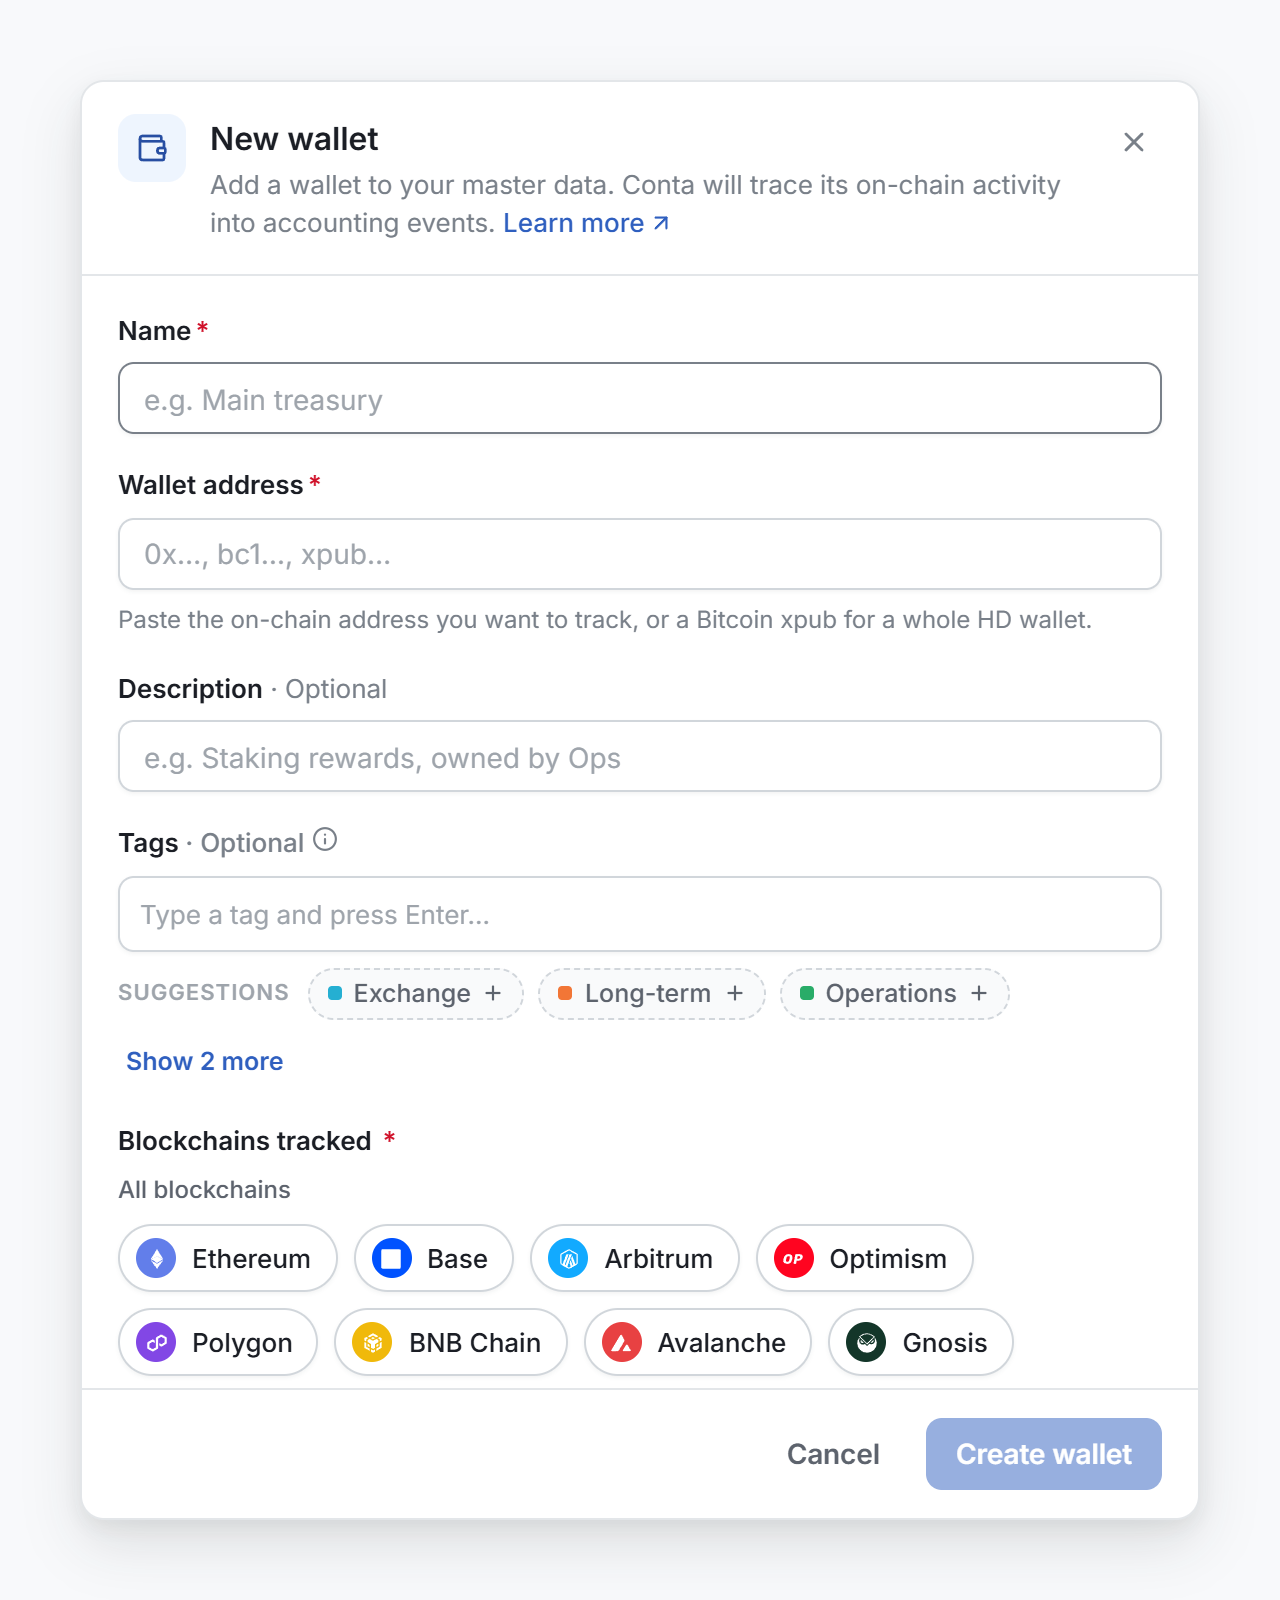
How the form reads the address
The form offers only the blockchains where the address can exist.
- EVM address (
0x…): the same address exists on every EVM blockchain, such as Ethereum, Base or Arbitrum. The form checks where it holds a balance or has activity. - Solana or Bitcoin address: the form selects that one blockchain.
- Sui or Aptos address (
0x…, longer than an EVM address): the two blockchains use the same address format. The form checks where the address holds a balance or has activity. - NEAR account: type its name, such as
alice.near. The form selects NEAR and shows what the account holds. A name that holds nothing shows under Not checked or no activity found: check its spelling. - Cosmos address: the prefix names one blockchain, such as
cosmos1…for Cosmos Hub. The form selects it and turns off the others.
If Conta Finance does not support the format, the field says so.
Choose the blockchains
The chips of Blockchains tracked are in groups:
| Group | What it means |
|---|---|
| With balance or activity | The address has a balance or transactions there. These come selected, and each chip shows what was found. |
| Not checked or no activity found | The address can exist there, but nothing was found or the blockchain could not be read. Select a chip if you use the address there. |
| Other blockchains | The address cannot exist there. These are off. |
Select only the blockchains you use. Each one is imported separately.
Ethereum advanced options
When Ethereum is selected, Ethereum advanced options offers two settings. Leave them off unless they apply to you:
- Scan blob fees (EIP-4844, for rollup batchers)
- Fetch mined blocks (validator/proposer fee recipient rewards)
A blockchain that is not in the list
Select New blockchain at the end of the chips. Fill the form and select Create blockchain. Or write to [email protected] and we add it.
Bitcoin HD wallets
To track every address of a Bitcoin HD wallet as one account, paste its xpub, ypub or zpub, or a descriptor. The form shows one option per Address type, with what it found. The type with activity comes selected. A figure with a + is a minimum: the import reads the full history.
Private keys, testnet keys and multisig wallets are not accepted.
After you save
The import runs in the background. A notice at the top of every page says Importing an account and reading its history. When it says the import finished, reload the page.
Edit or delete an account
On the Accounts page, open the menu at the end of the row.
- Edit changes the name, the description, the tags and the blockchains. The address cannot change. Unchecking a blockchain stops tracking the account there.
- Delete account stops tracking the account on all its blockchains and removes its tags. Its history stays in the ledger. You cannot undo this.
Add many wallets at once
- Select New account, then Bulk wallet import.
- Select Download template, fill one row per wallet, and drop the file back. What goes in each column explains each column. Separate several blockchains or tags with
|. - If a row of the file has an error, the window names its line. Fix it in the file and upload it again, or import only the good rows.
- Select Import … wallets.
Nothing is saved until you import.
Accounts you already track
If the list holds an account that you already track, the button reads Review … already tracked. For each account, choose:
- Keep our name (the default): the account stays as it is.
- Use the imported name: the name from the list replaces it.
- Skip this account: the account is left out of the import.
Tags on the list go on the account with every choice. After the import, the window lists each row that failed, with the reason.